Post Azure Monitor Alerts in Microsoft Teams Channel
This topic is not new and quite frankly, it is hard to believe this is still not integrated yet, but at some point, during your cloud journey, you probably want to send monitoring alerts to a certain Teams channel. Even though this is functionality is available for plenty of other services, Azure Monitor still lacks this.
Table of Contents
Introduction
In this post, I will showcase how you can create notifications in a Microsoft Teams channel leveraging Azure Functions with PowerShell.
Let’s do this!
Szenario
To post a notification of a triggered Azure Alert, we need an intermediate layer between the Azure Monitor and Microsoft Teams. Azure Monitor alerts trigger assigned Action Groups which perform one or more actions, for instance sending an E-Mail, calling a webhook and several more. One Alert can have several Actions Groups. With this, we you can keep all your Action Groups as they are and add another one which will create a notification in a Microsoft Teams channel.
We will create one global Action Group that can be used to post notifications to a certain Teams Channel from all Azure Alerts. The Action Group has one action configured - calling an Azure Function - which will call the webhook of the Teams channel. The function will process the payload that is send from the alert and put it in a format that can be handled by the Teams channel webhook.
Setup
Teams Channel
If you haven’t already, create a team and one dedicated channel for your notifications. Afterwards we need to create a webhook for this channel. Save the webhook for now.
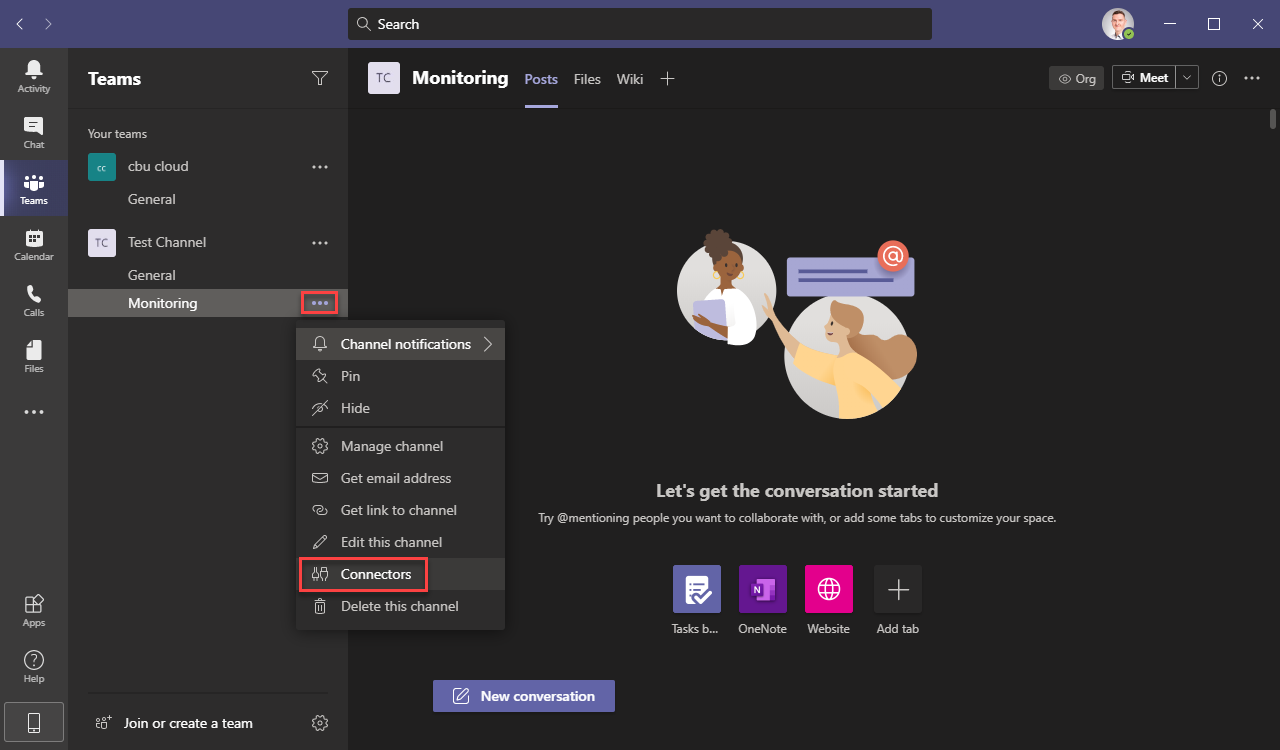 Create team and channel for notifications
Search for webhook and select "Incoming Webhook"
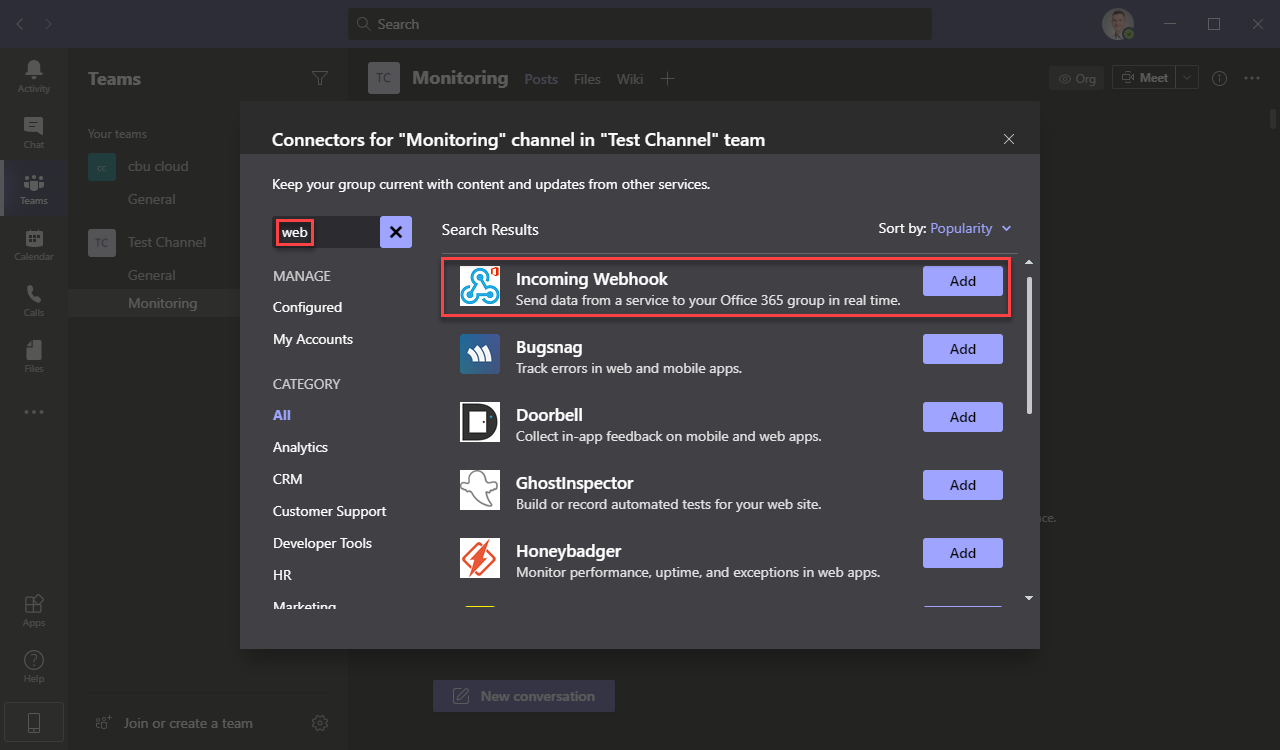 Search for webhook
Provide Parameters for the webhook:
- Name - for instance something like “Azure Monitor Alerts”
- Customize Image - you can use your trusted internet search engine for the icon of the Azure Monitor
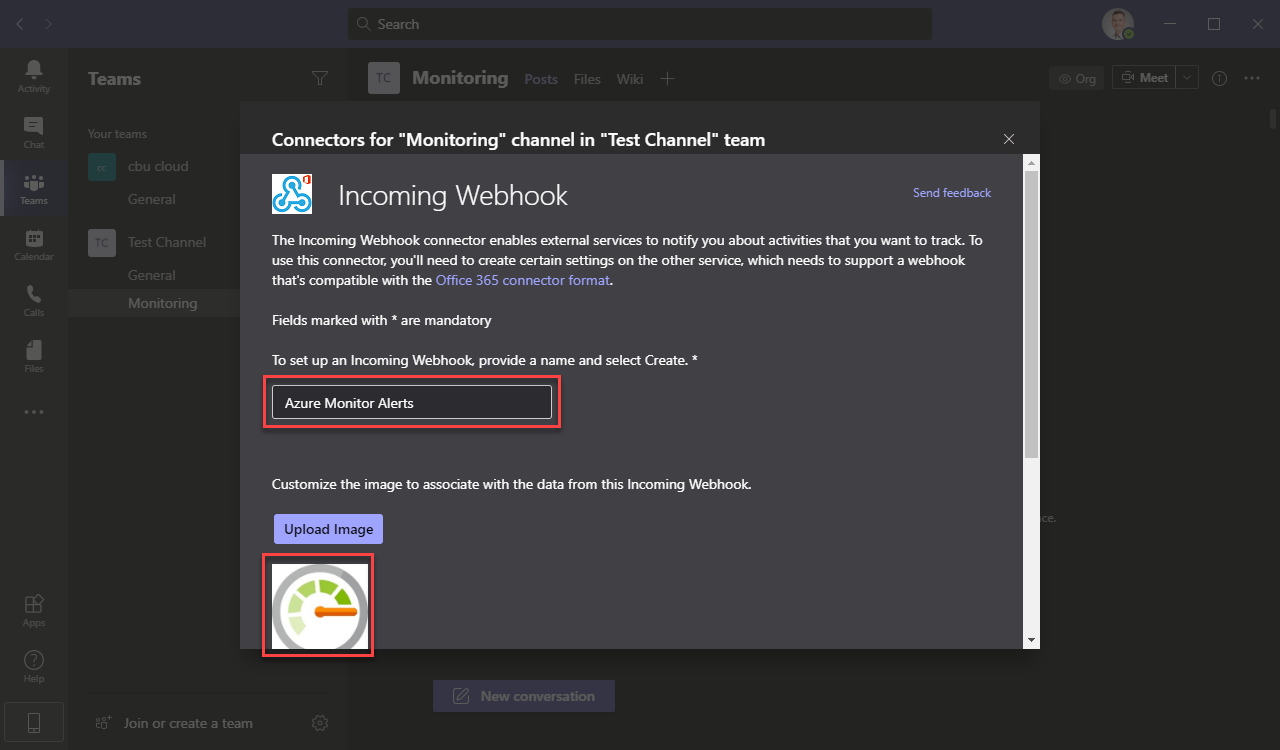 Provide Attributes
Copy the webhook URL and save it to a secure place! We need it later on.
Treat it like a password and do not share or use it in an unsecure manner. Anyone who has this link, can create posts in this particular channel.
 Save Webhook URL
Function App
To deploy the Function App, I created an Azure DevOps Pipeline.
You can find the pipeline and the entire code in the GitHub Repo AzureMonitorTeamsNotification.
Setup
Azure DevOps Project
You can either create new Azure DevOps project for this, or just use an existing one.
Repository
It doesn’t matter if you want to use a GitHub repository or an Azure Repository, just copy the code and you can then modify it to your needs. I choose GitHub for obvious reasons 😉
In case you are using an existing Azure DevOps Project, I suggest creating at least a new repository for the code.
Service Connections
You need to create a service connection to your Azure tenant for the subscription you want to use. You can set it up as described in this MS docs article. If you want to use a GitHub repository, create a connection for this as well: Create GitHub Service Connection.
Pipeline
With the code in place and the repository connected, we can create the pipeline.
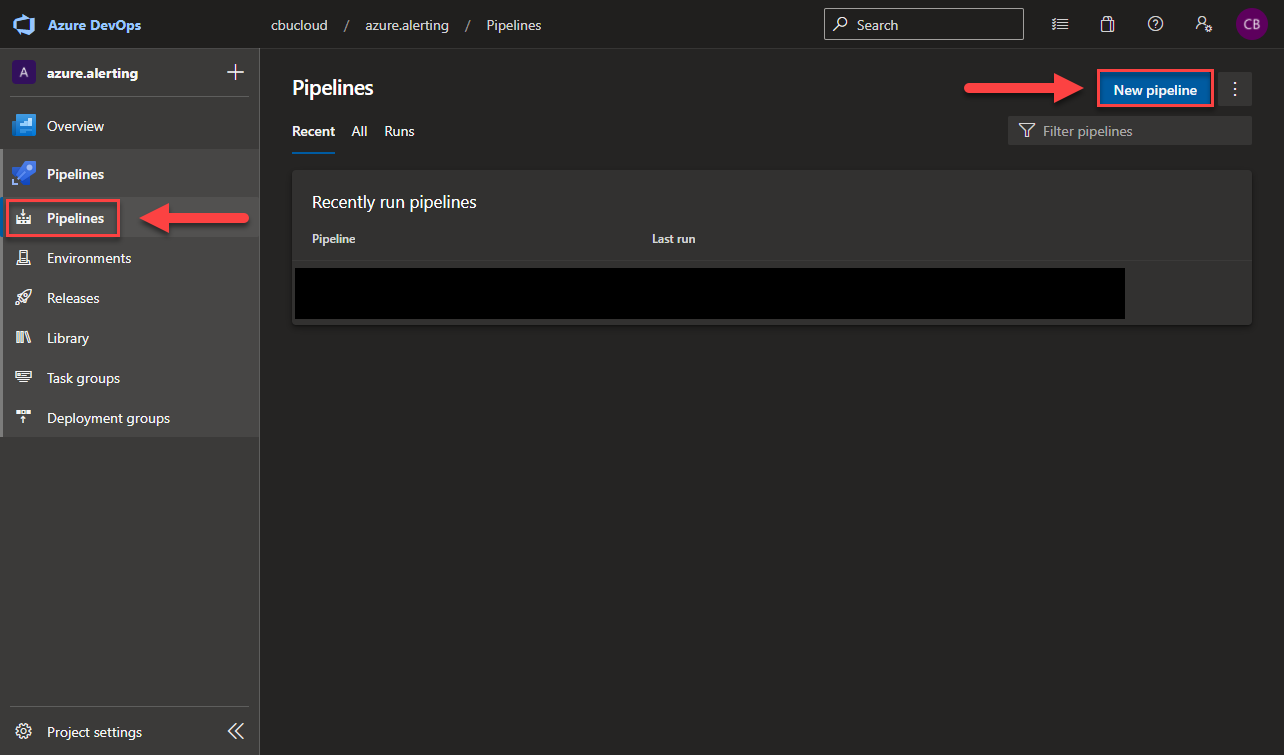 Create New Pipeline
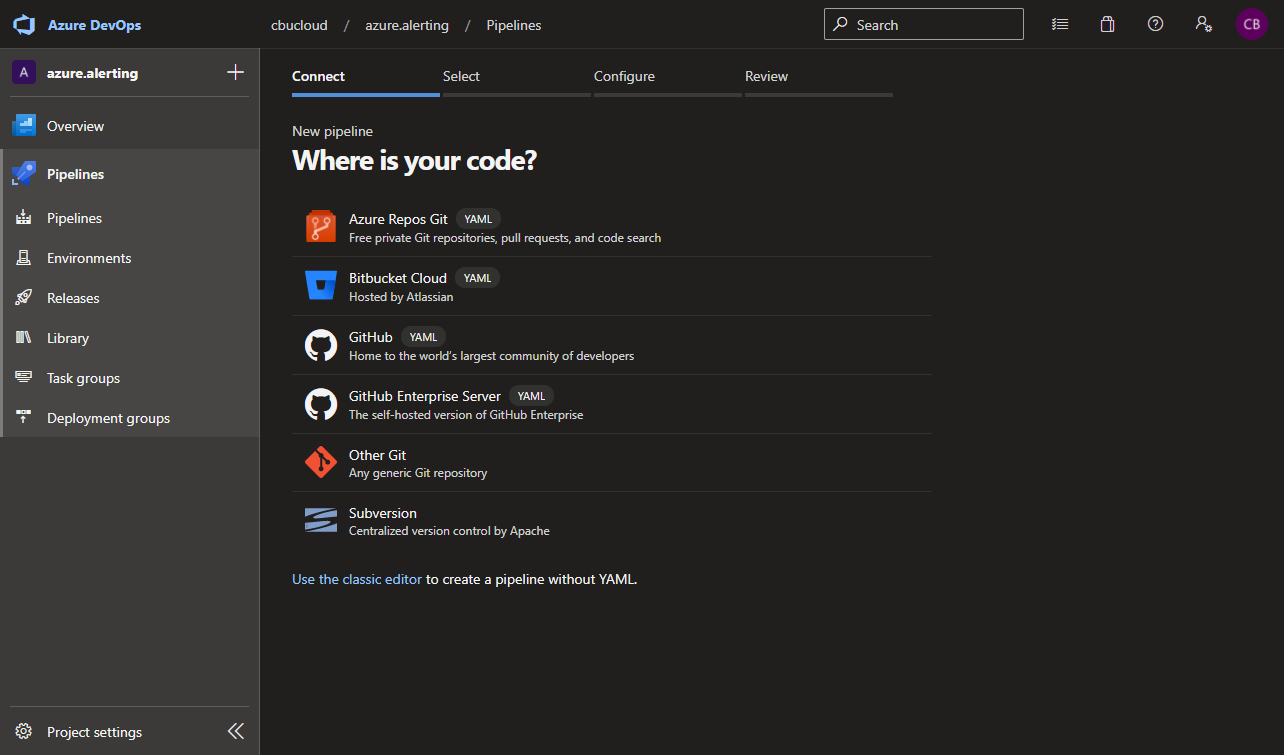 Select Source
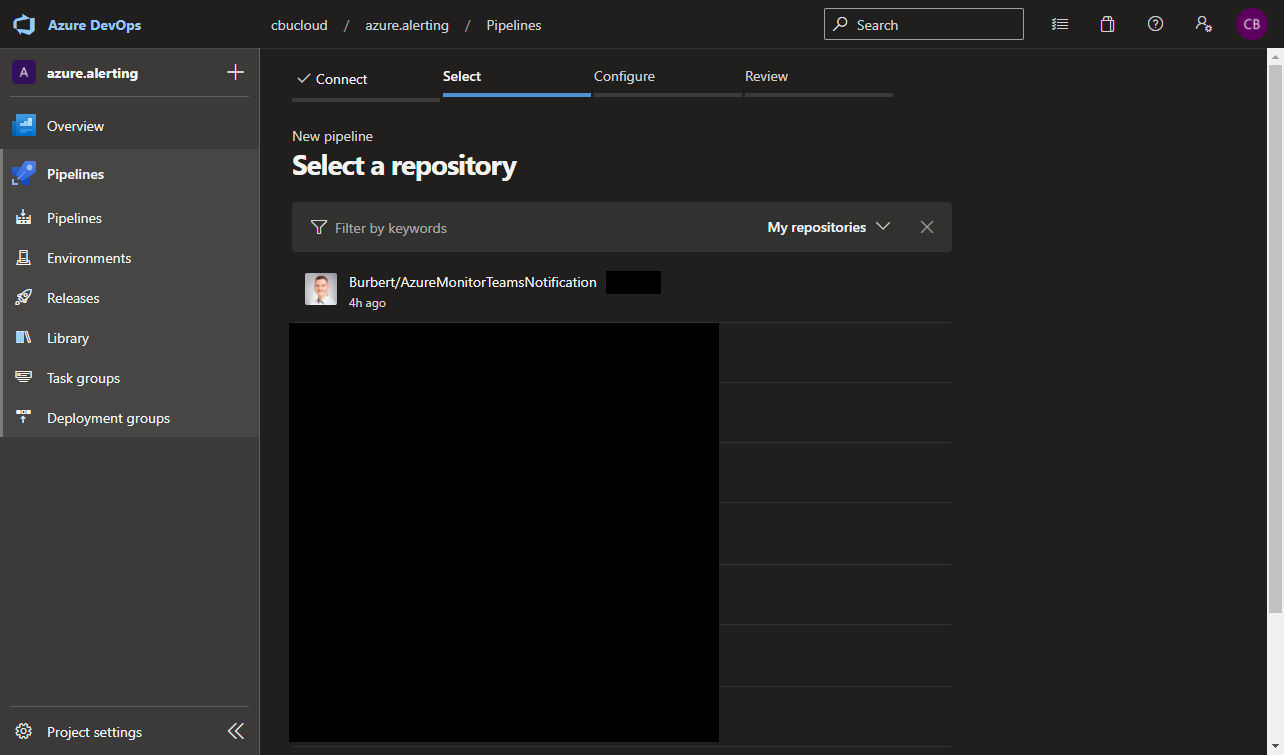 Select Repository
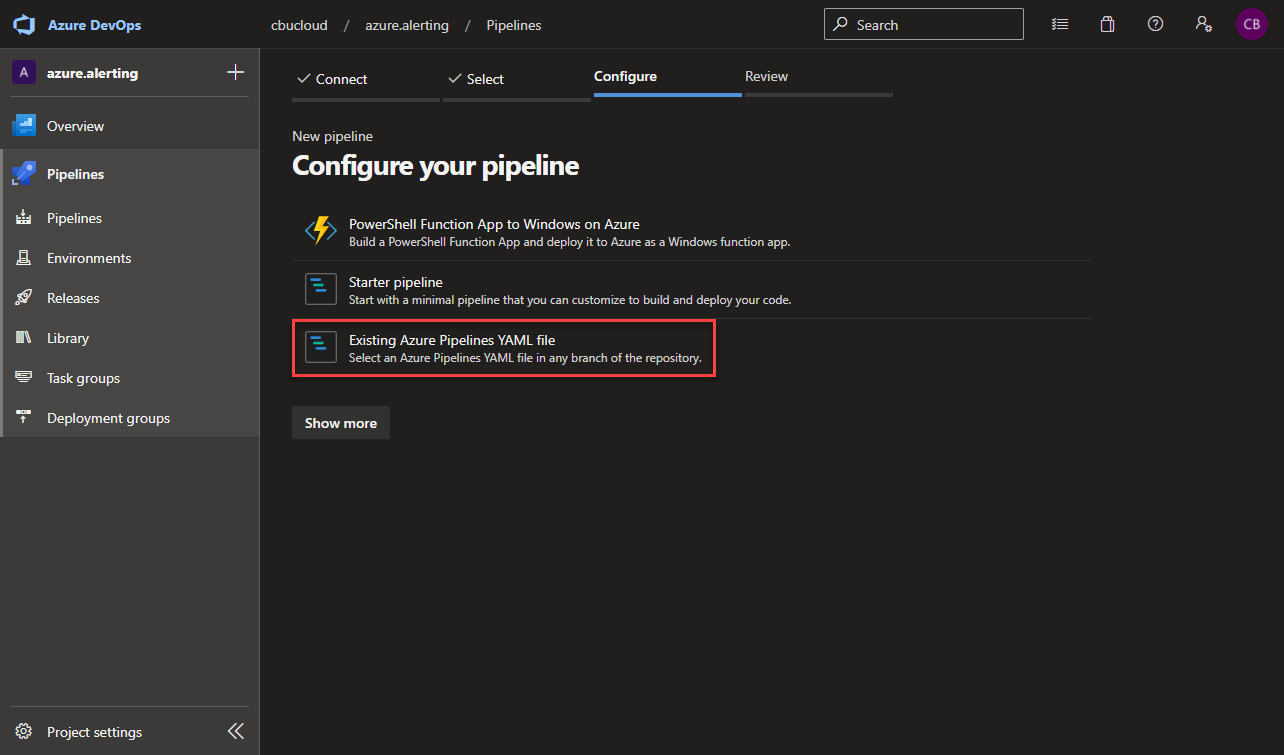 Select Existing Azure Pipelines YAML file
Under Path, choose the one existing pipeline file /.azurepipelines/deploy.yml
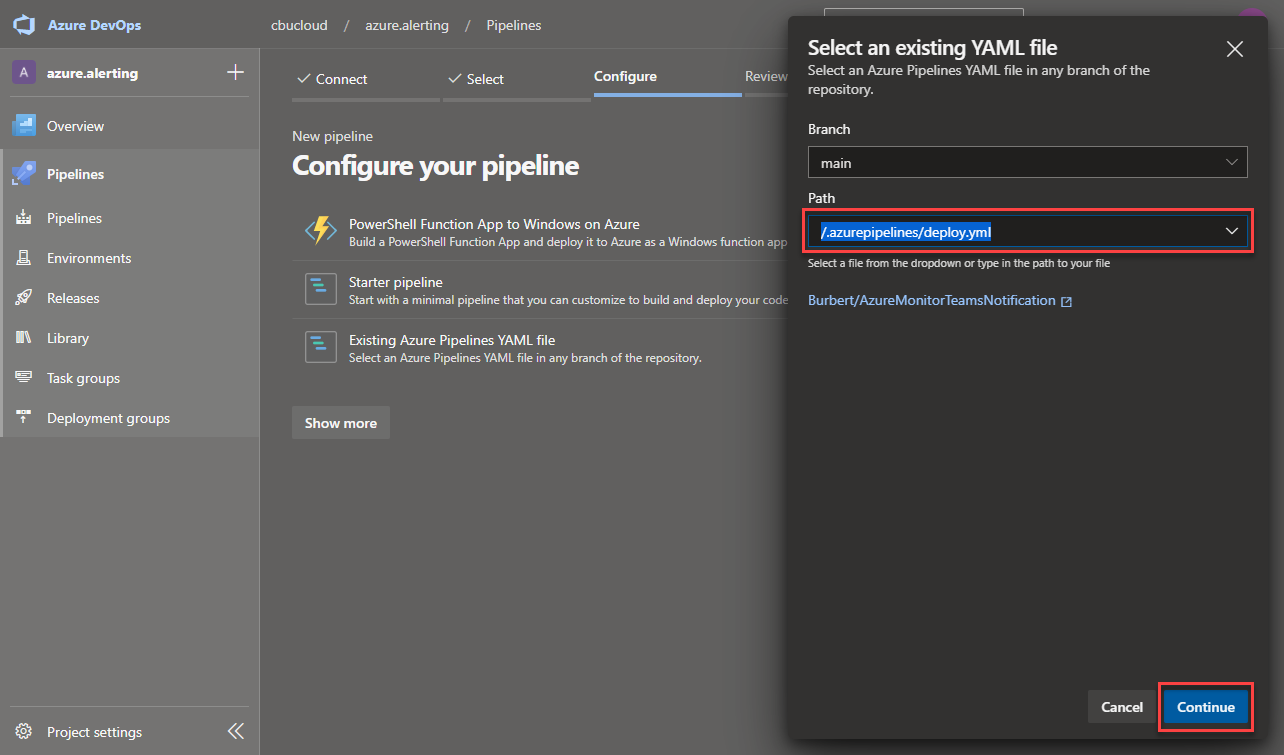 Choose YAML File
At first, edit the trigger to your needs and afterwards, edit line 47 and 81 to your Azure Service Connection name and save the pipeline, do not run it yet, it will fail at this point.
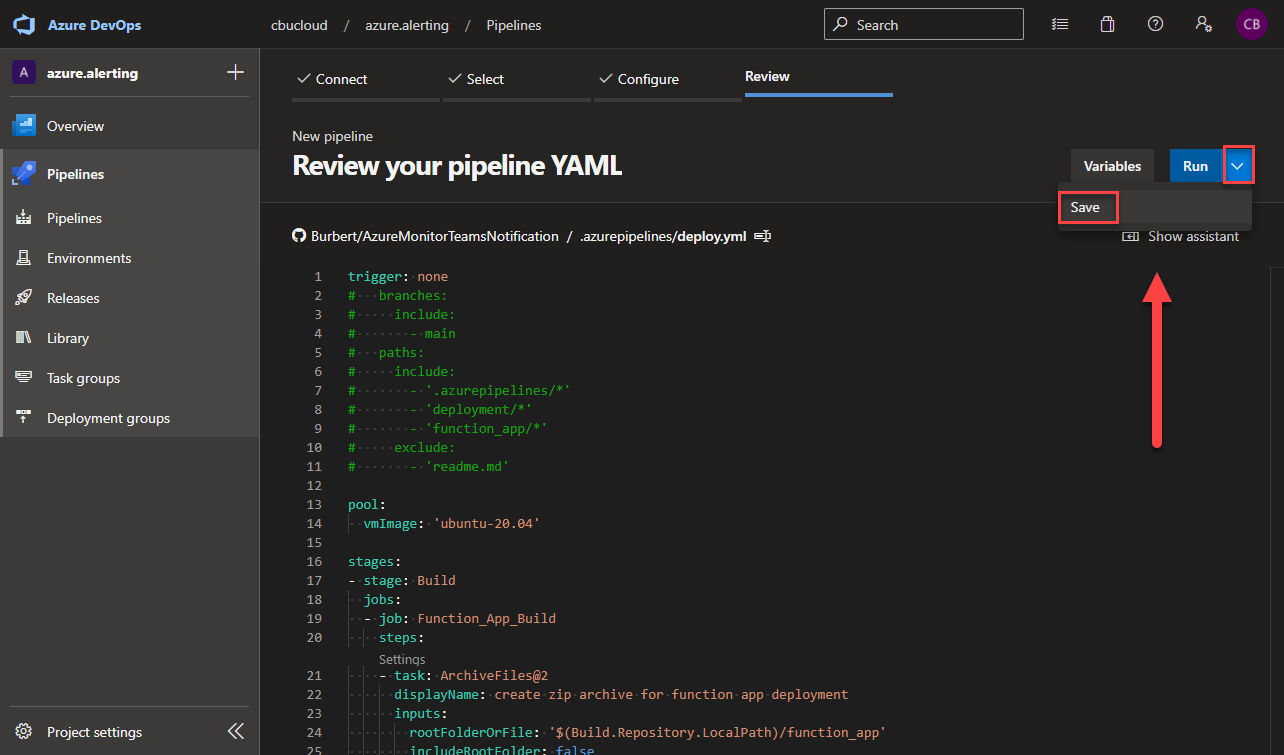 Save Pipeline
Variable Group
Now we need a new variable group to store the values for the pipeline in.
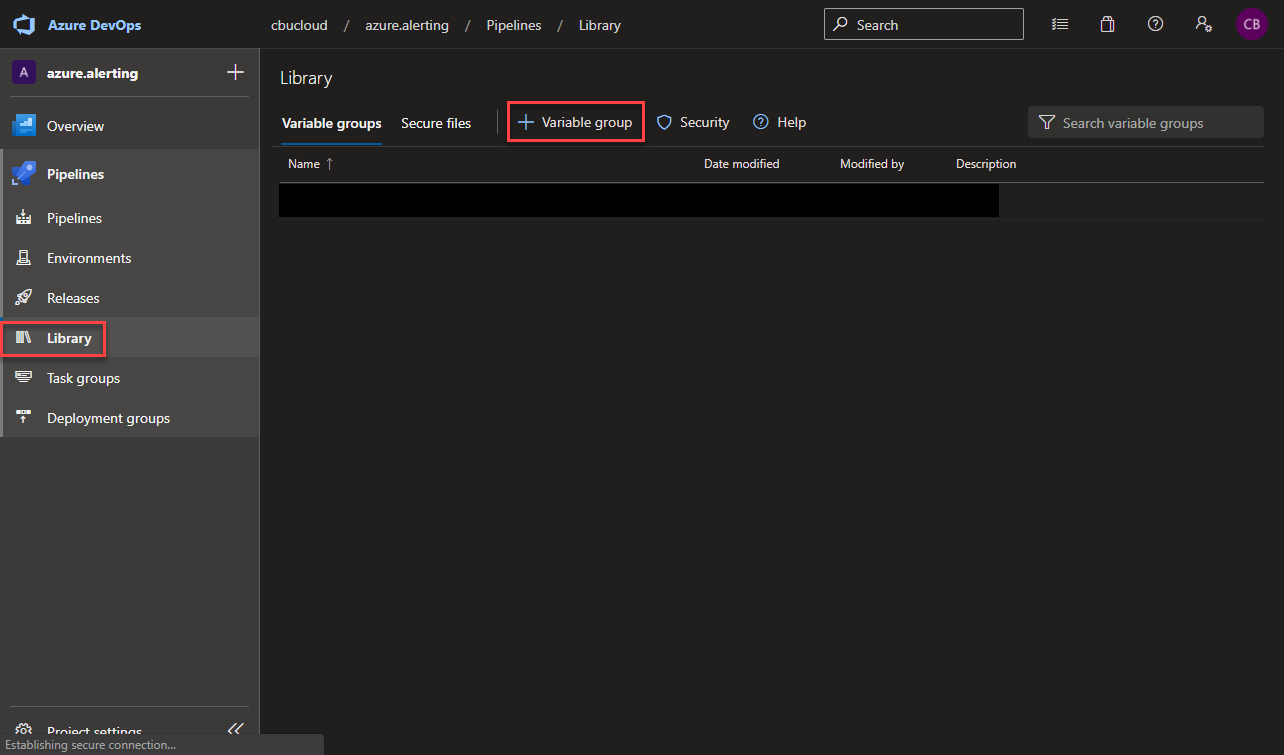 Create Variable Group
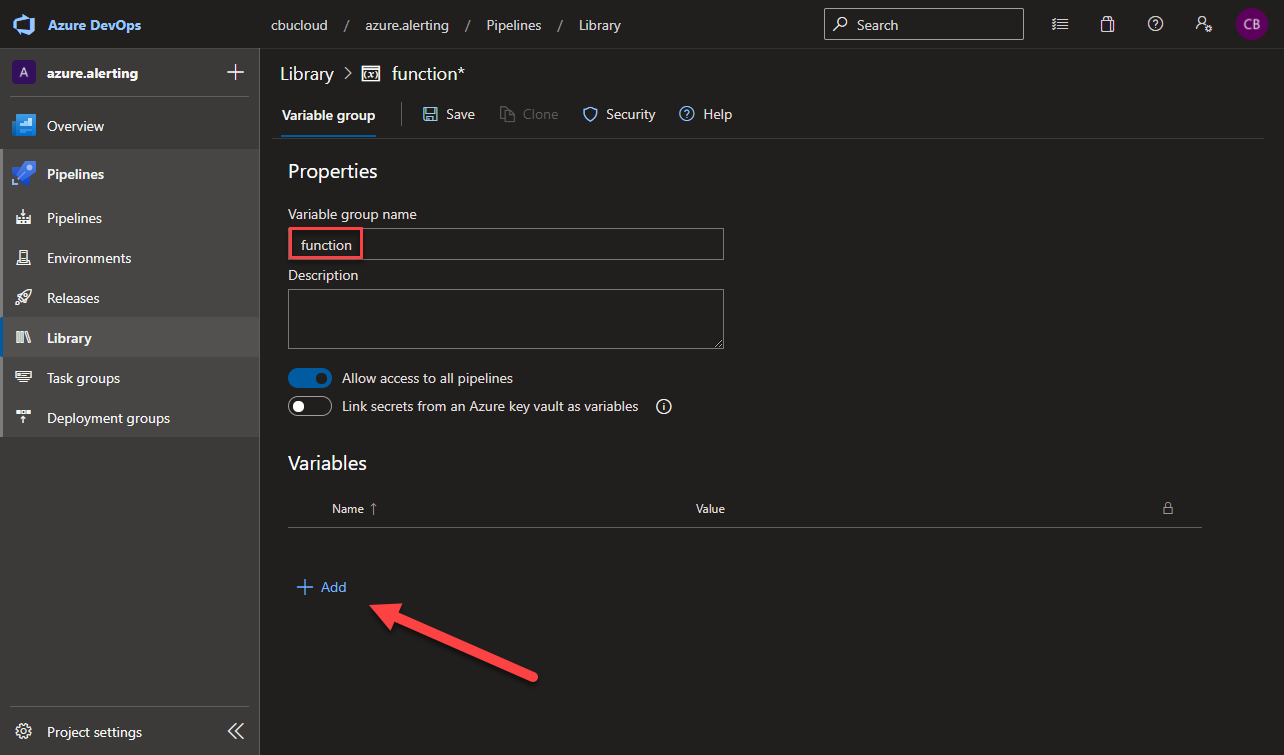 Save Variable Group
- create a group called function (this name is currently set in the pipeline, if you want to use another name, you need to change the pipeline value as well)
- add description and add the following values:
| Name | Value | Secret | Description |
|---|---|---|---|
| app_insights_name | azalerts-appins | False | Name of Application Insights Workspace |
| function_app_name | azalerts | False | name of Function App |
| function_runtime | powershell | False | Runtime of Function App |
| hosting_plan_name | azalerts-cons-plan | False | Name of Consumption Hosting Plan |
| location | westeurope | False | Name of Azure Region |
| resouce_group | az-teams-alerts | False | Name of the resouce group for the resouces |
| storage_account_name | azalersts3565453stor | False | Name of storage account |
| storage_account_type | Standard_LRS | False | SKU of storage account |
| subscription_id | d97f3632-50f0-4d1d-981e-1d92b12528a2 | True | Azure Subscription ID |
| subscription_name | Prod Sub | False | Name of the Azure Subscription |
| teams_webhook_url | https://outlook.office.com.. | True | Webhook URL |
Change the values to the ones that fit your environment.
Deployment
With all this in place, the Function App can be deployed, just click the run button within the pipeline and your job should finish like this:
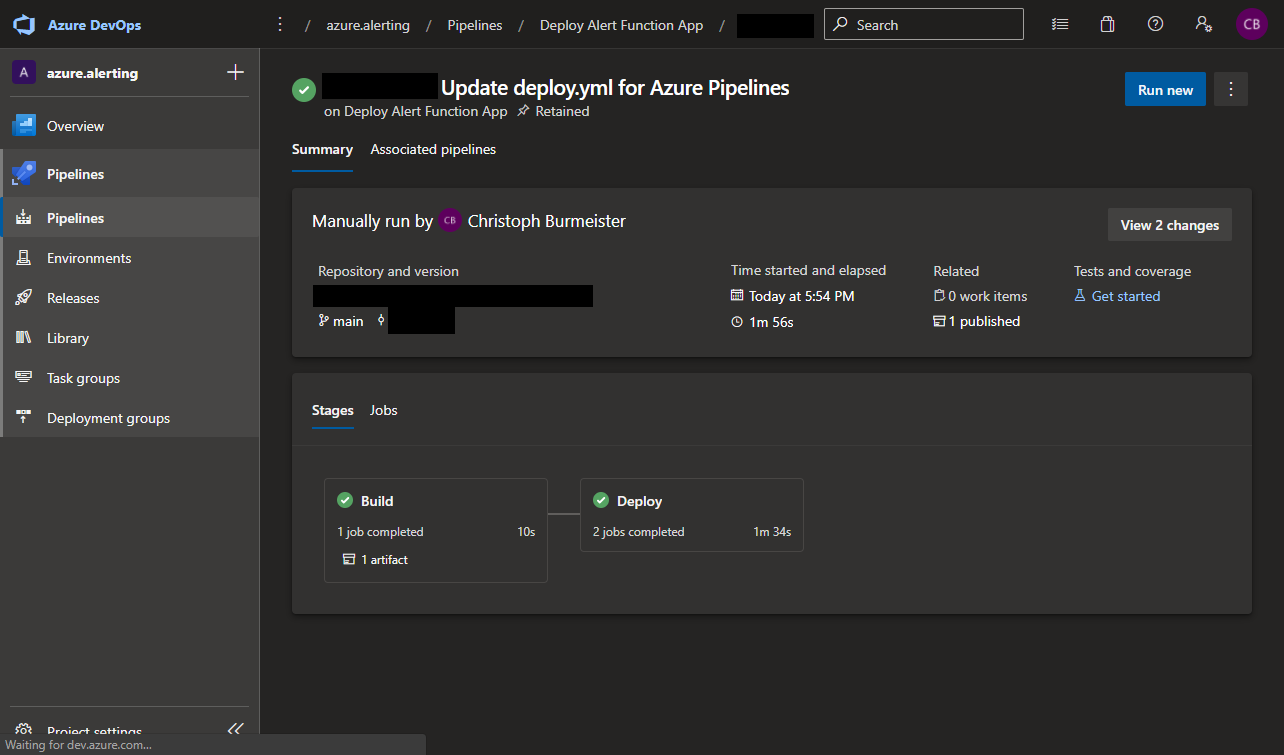 Azure Pipeline Result
Function URl
Go to the Azure Portal and navigate to the created Function App and search for the deployed function createTeamsChannelNotification.
It can take a few moments right after the deployment for the function to show up.
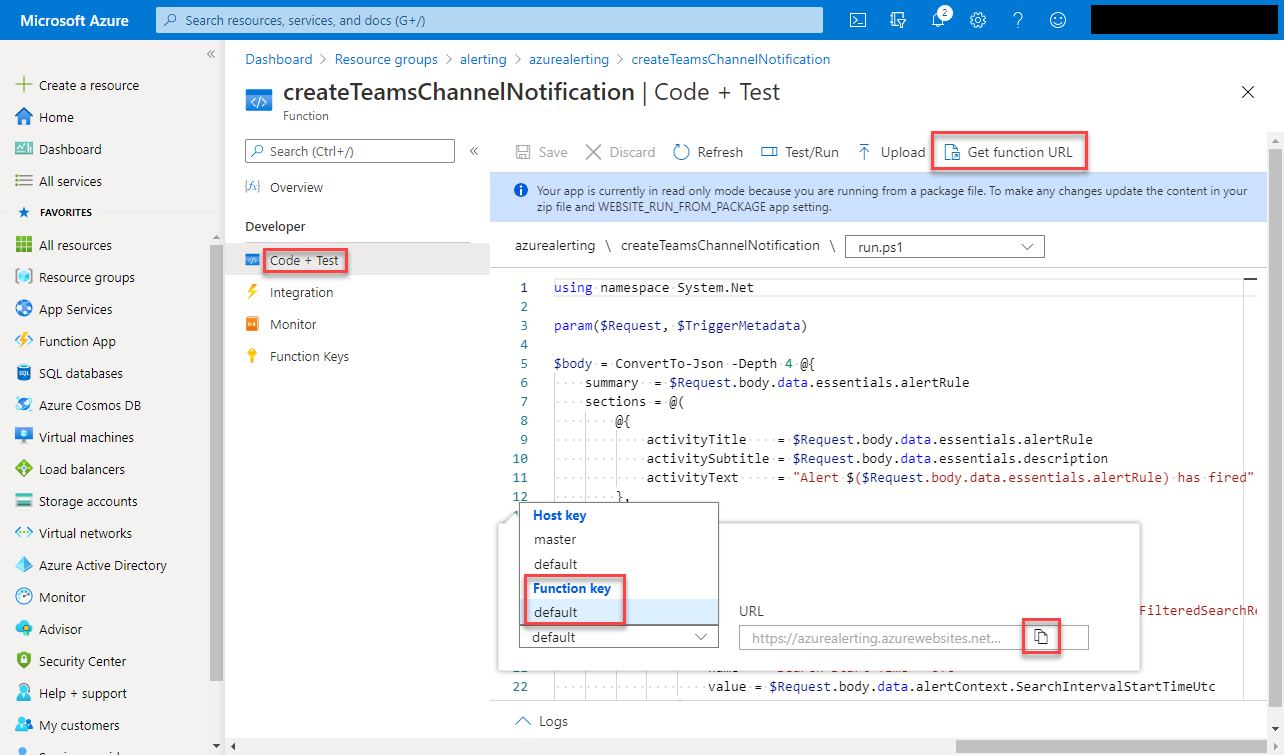 Get Function URL with Authentication Token
Save the function url with the authentication token to a secure location, treat this like Teams channel webhook (described above).
Action Group
Lastly, we need to create the Action Group. Open the Azure Monitor in the Azure Portal and go the Alert section.
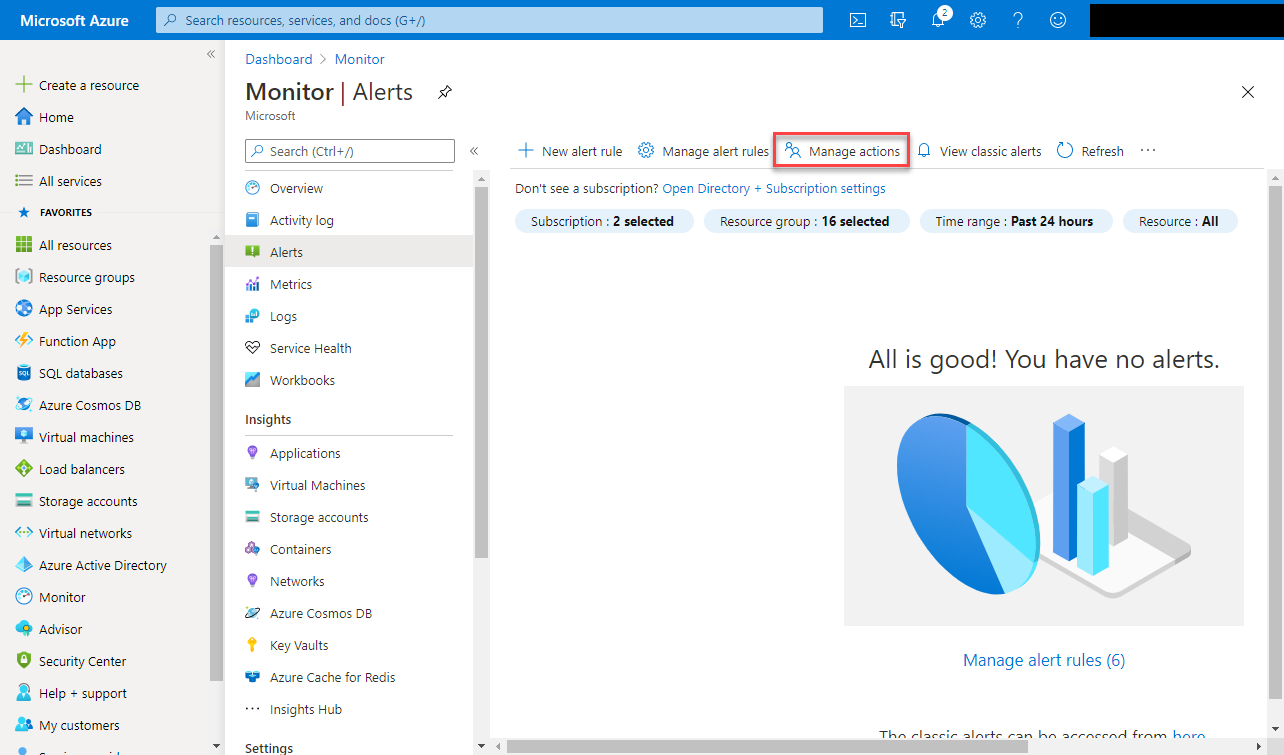 Manage Action Groups
Click Manage Actions and create a Add action group.
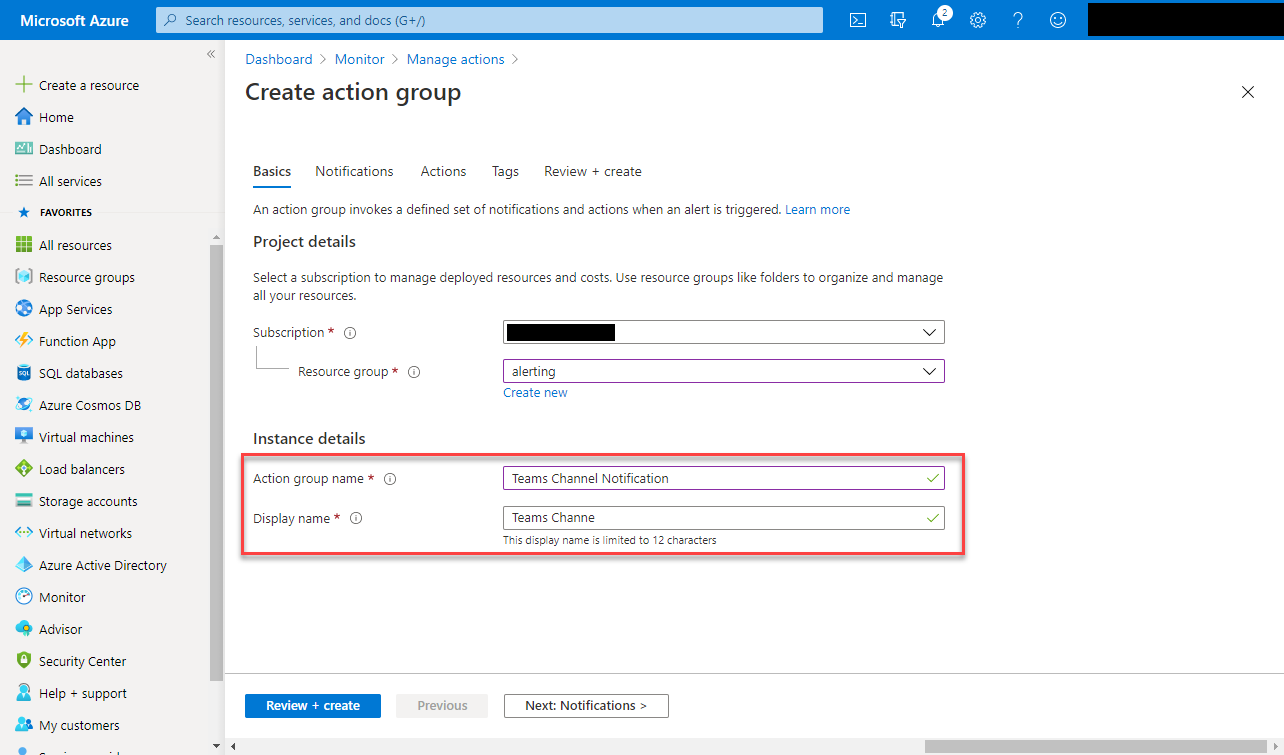 Add Action Group Basic Information
 Add Action Group Basic Information
Click Next: Notifications and leave the section empty, for this, we don’t need it.
Click Next: Actions and add one action of type Webhook and name the action. On the right side, a window pops up, enter the URL of the function from earlier.
Select Enable the common alert schema.
The Common Alert Schema describes the payload that will be sent from the Azure Monitor to the Function App, it contains all the data of the alert.
Conclusion
Now you can add the action group to your alerts and they will also sent notifications to the Teams channel 😉
They will look something like this:
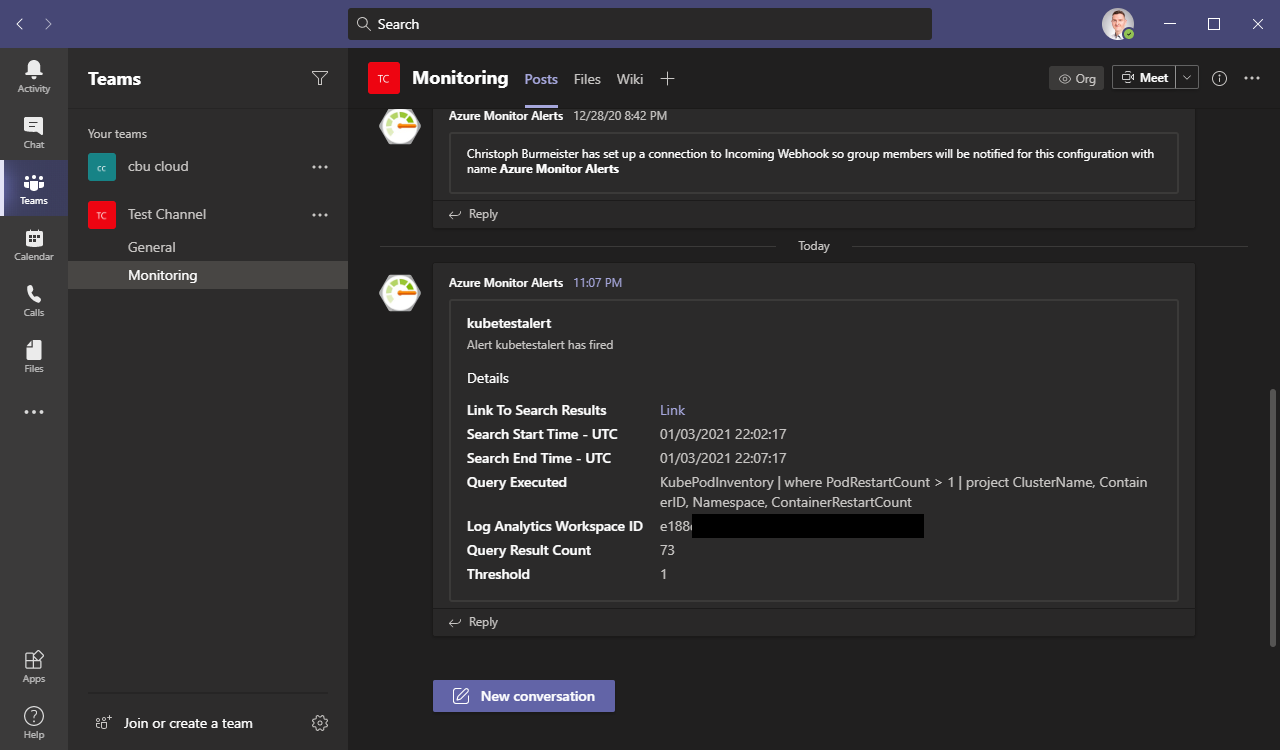 Azure Alert Teams Notification
According to the Common Alert Schema, you can change the shown values, just alter the code of the createTeamsChannelNotification function in the facts section.