Configure Azure Function App for root domain redirection with SSL support

Learn how to redirect custom domain traffic for HTTP and HTTPS (with free valid certificate) to another domain with Azure Functions.
This is a multi part article with the following parts:
- Part 1 - Static site generators
- Part 2 - Setup Azure Storage Account for static websites
- Part 3 - Setup Azure DNS for static websites
- Part 4 - Configure Azure CDN for static websites
- Part 5 - Configure Azure Function App for root domain redirection
- Part 6 - Setup Azure DevOps CI/CD pipeline for static websites
In this part we will implement an Azure Function to redirect traffic from the root of our staticwebsite.de domain to the www.staticwebsite.de domain. Then we will use Azure Function proxies and the Let’s Encrypt extension in combination with a PowerShell function to get a free SSL certificate.
Table of Contents
Introduction
As explained in part 4, it is currently not possible to add root domains like staticwebsite.de as a custom domain to Azure CDN. So we need a way to forward traffic to the www subdomain and still provide SSL support to satisfy the requirements for hsts preloading.
I had the following ideas:
- Use the rule engine of Azure CDN in Verizon Premium tier to send 301 replies - Does not work, as there is currently no way to add root domains to Azure CDN. None of the known workarounds work anymore.
- Use a function App with consumption plan to return a 301 HTTP status code - Would work
- Use function App with app service plan - Would work.
- App Service with smallest App service plan with SSL support - Would work
I chose the Function App, as it is the cheapest variant and I wanted to test and implement let’s encrypt with a PowerShell Function for a long time.
Setup Azure Function App
First we setup the Azure Function App with PowerShell as language worker.
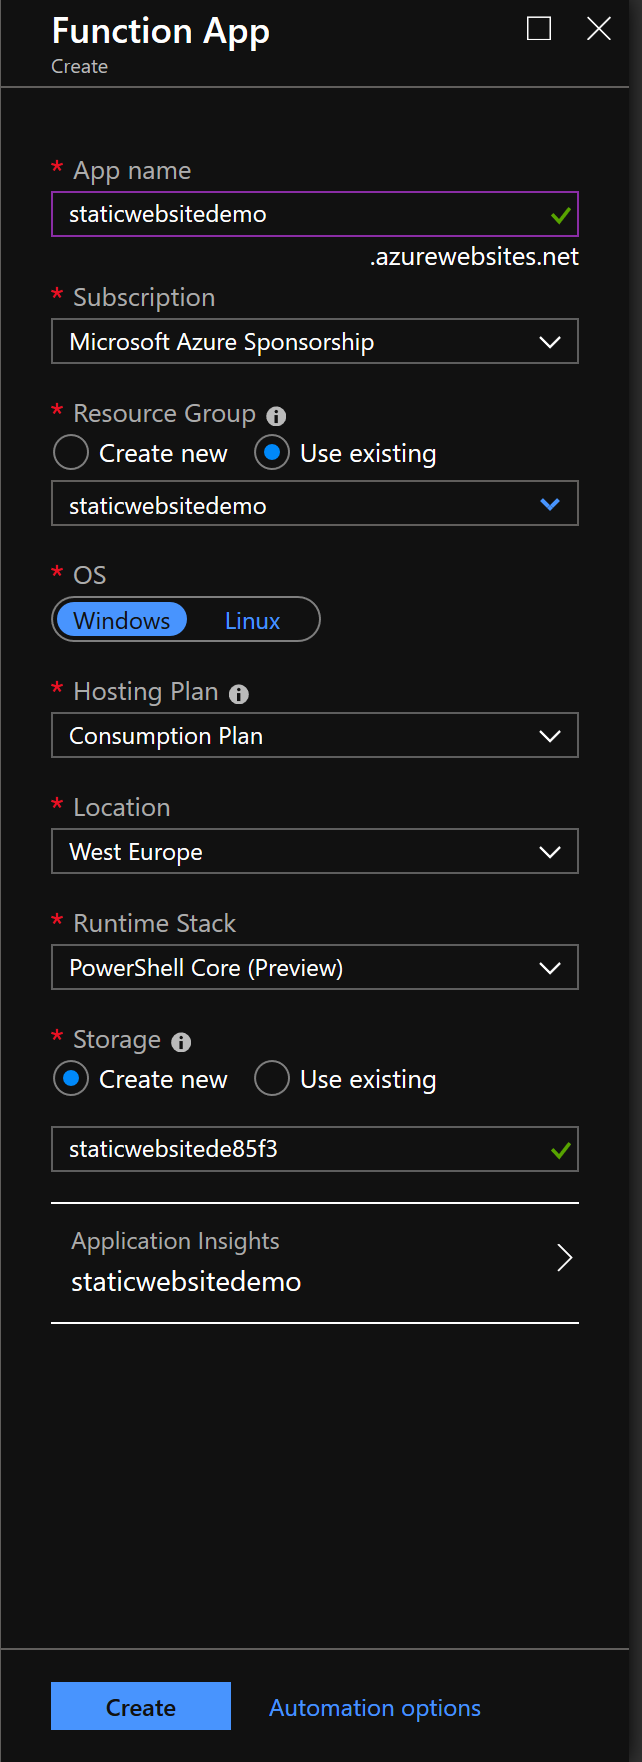 Function App setup
PowerShell Functions are still in Preview and thereby have no guaranteed SLA. To learn more about the possibilities of Azure functions check out our Azure Maintenance Function Blog series.
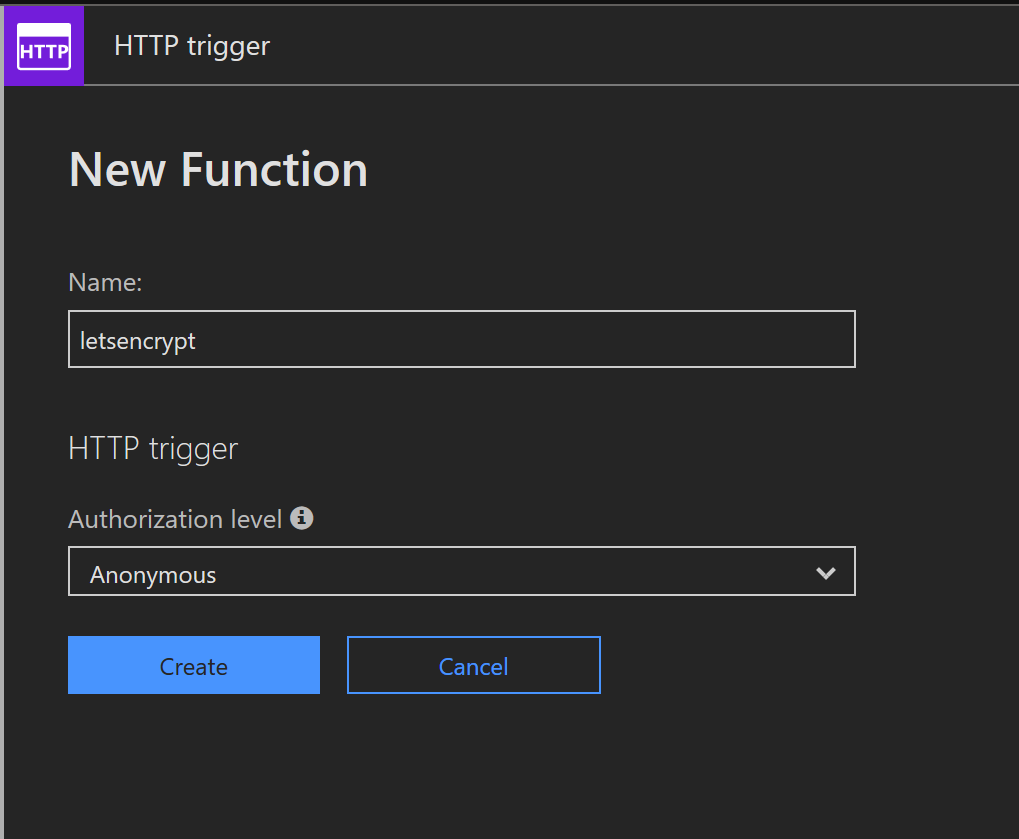
Redirection function
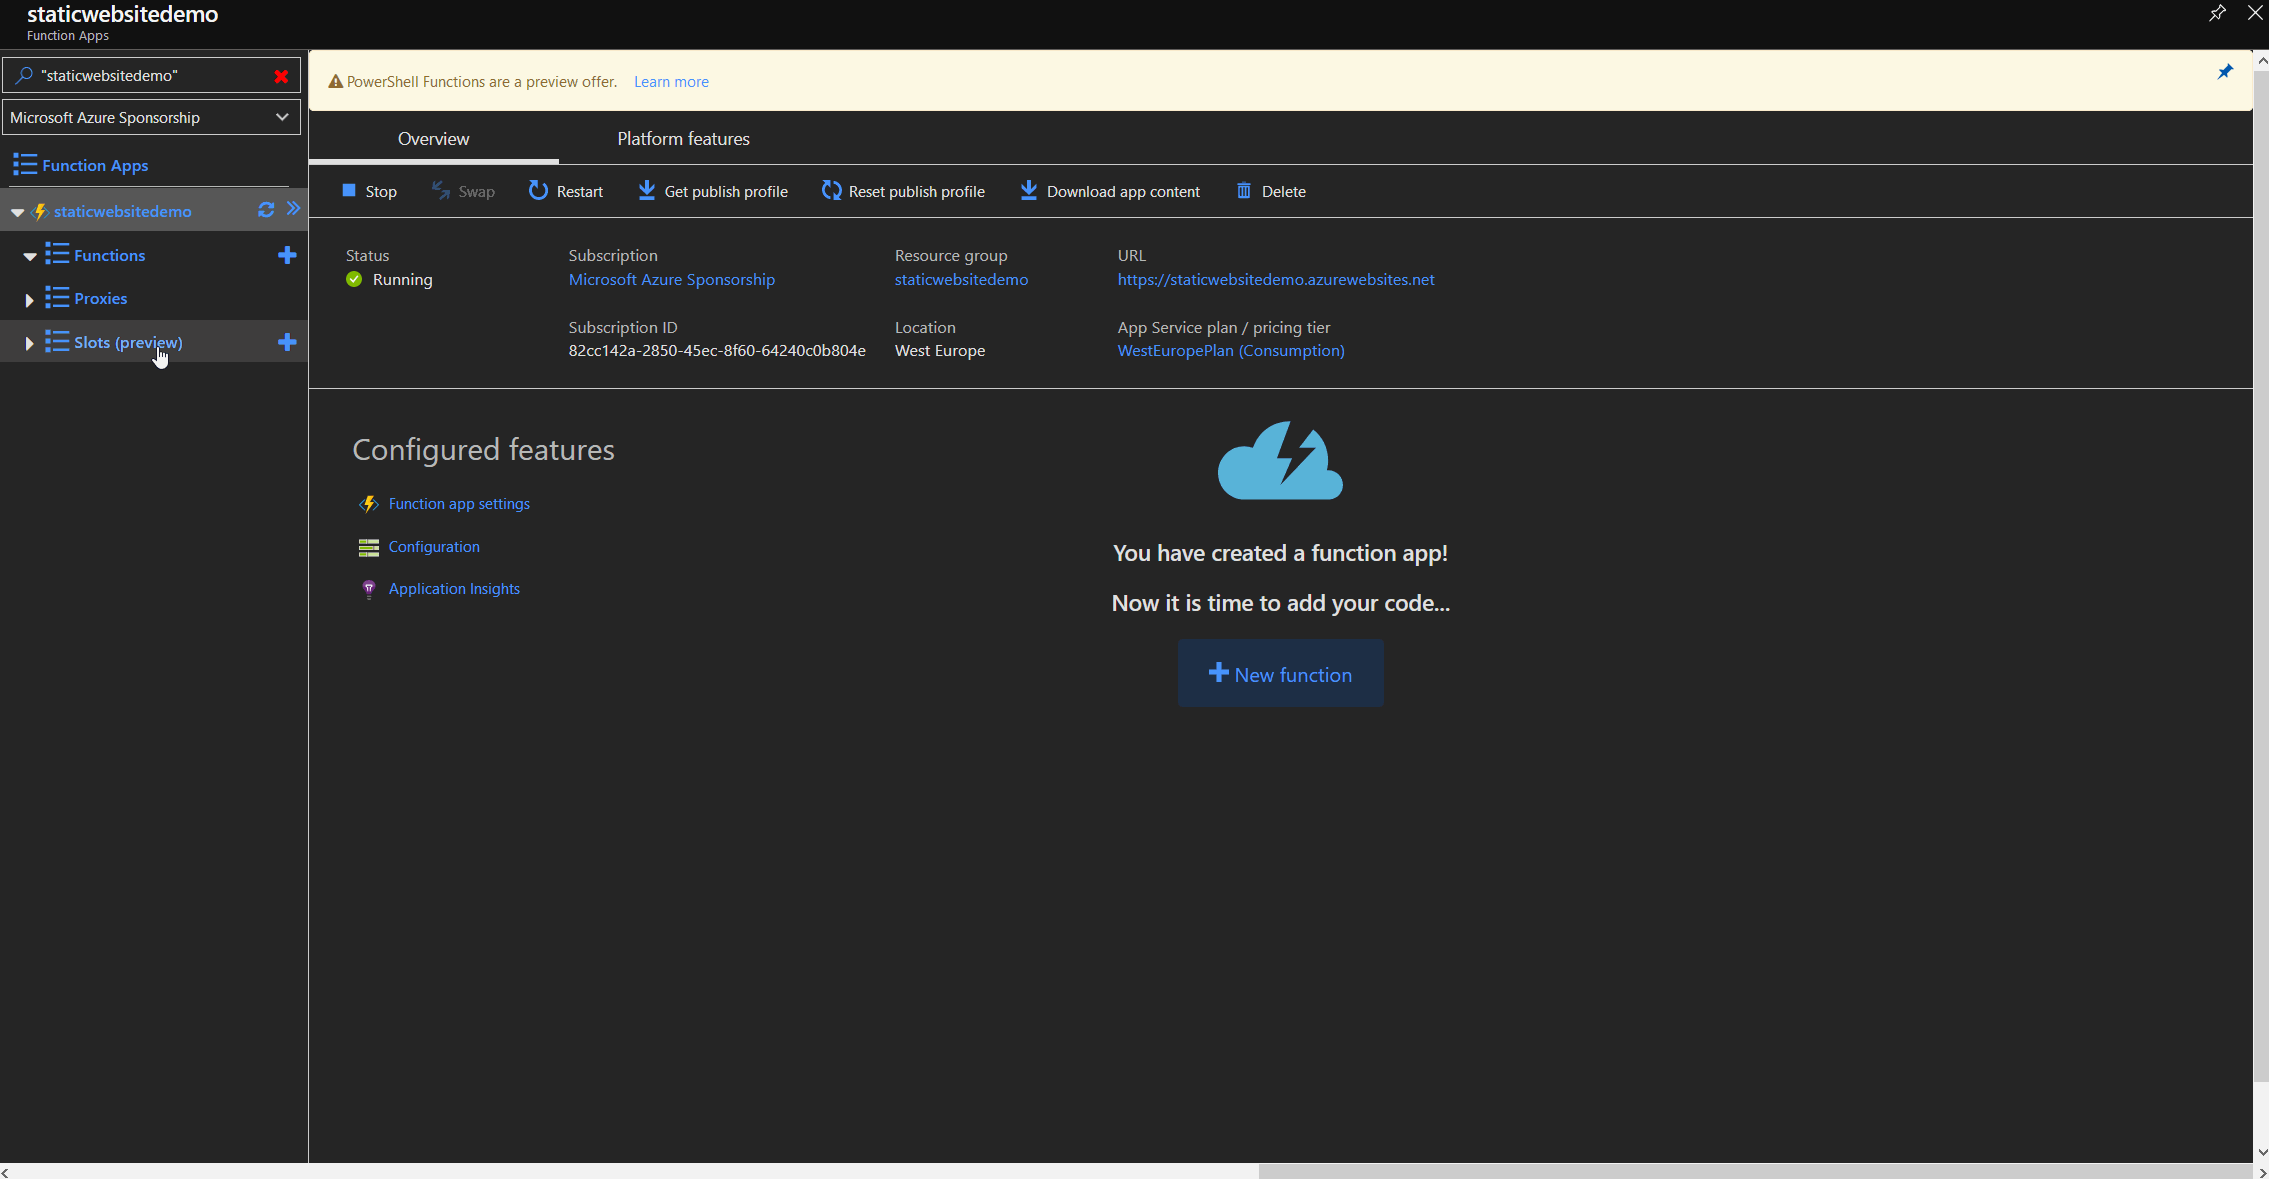 Redirector function
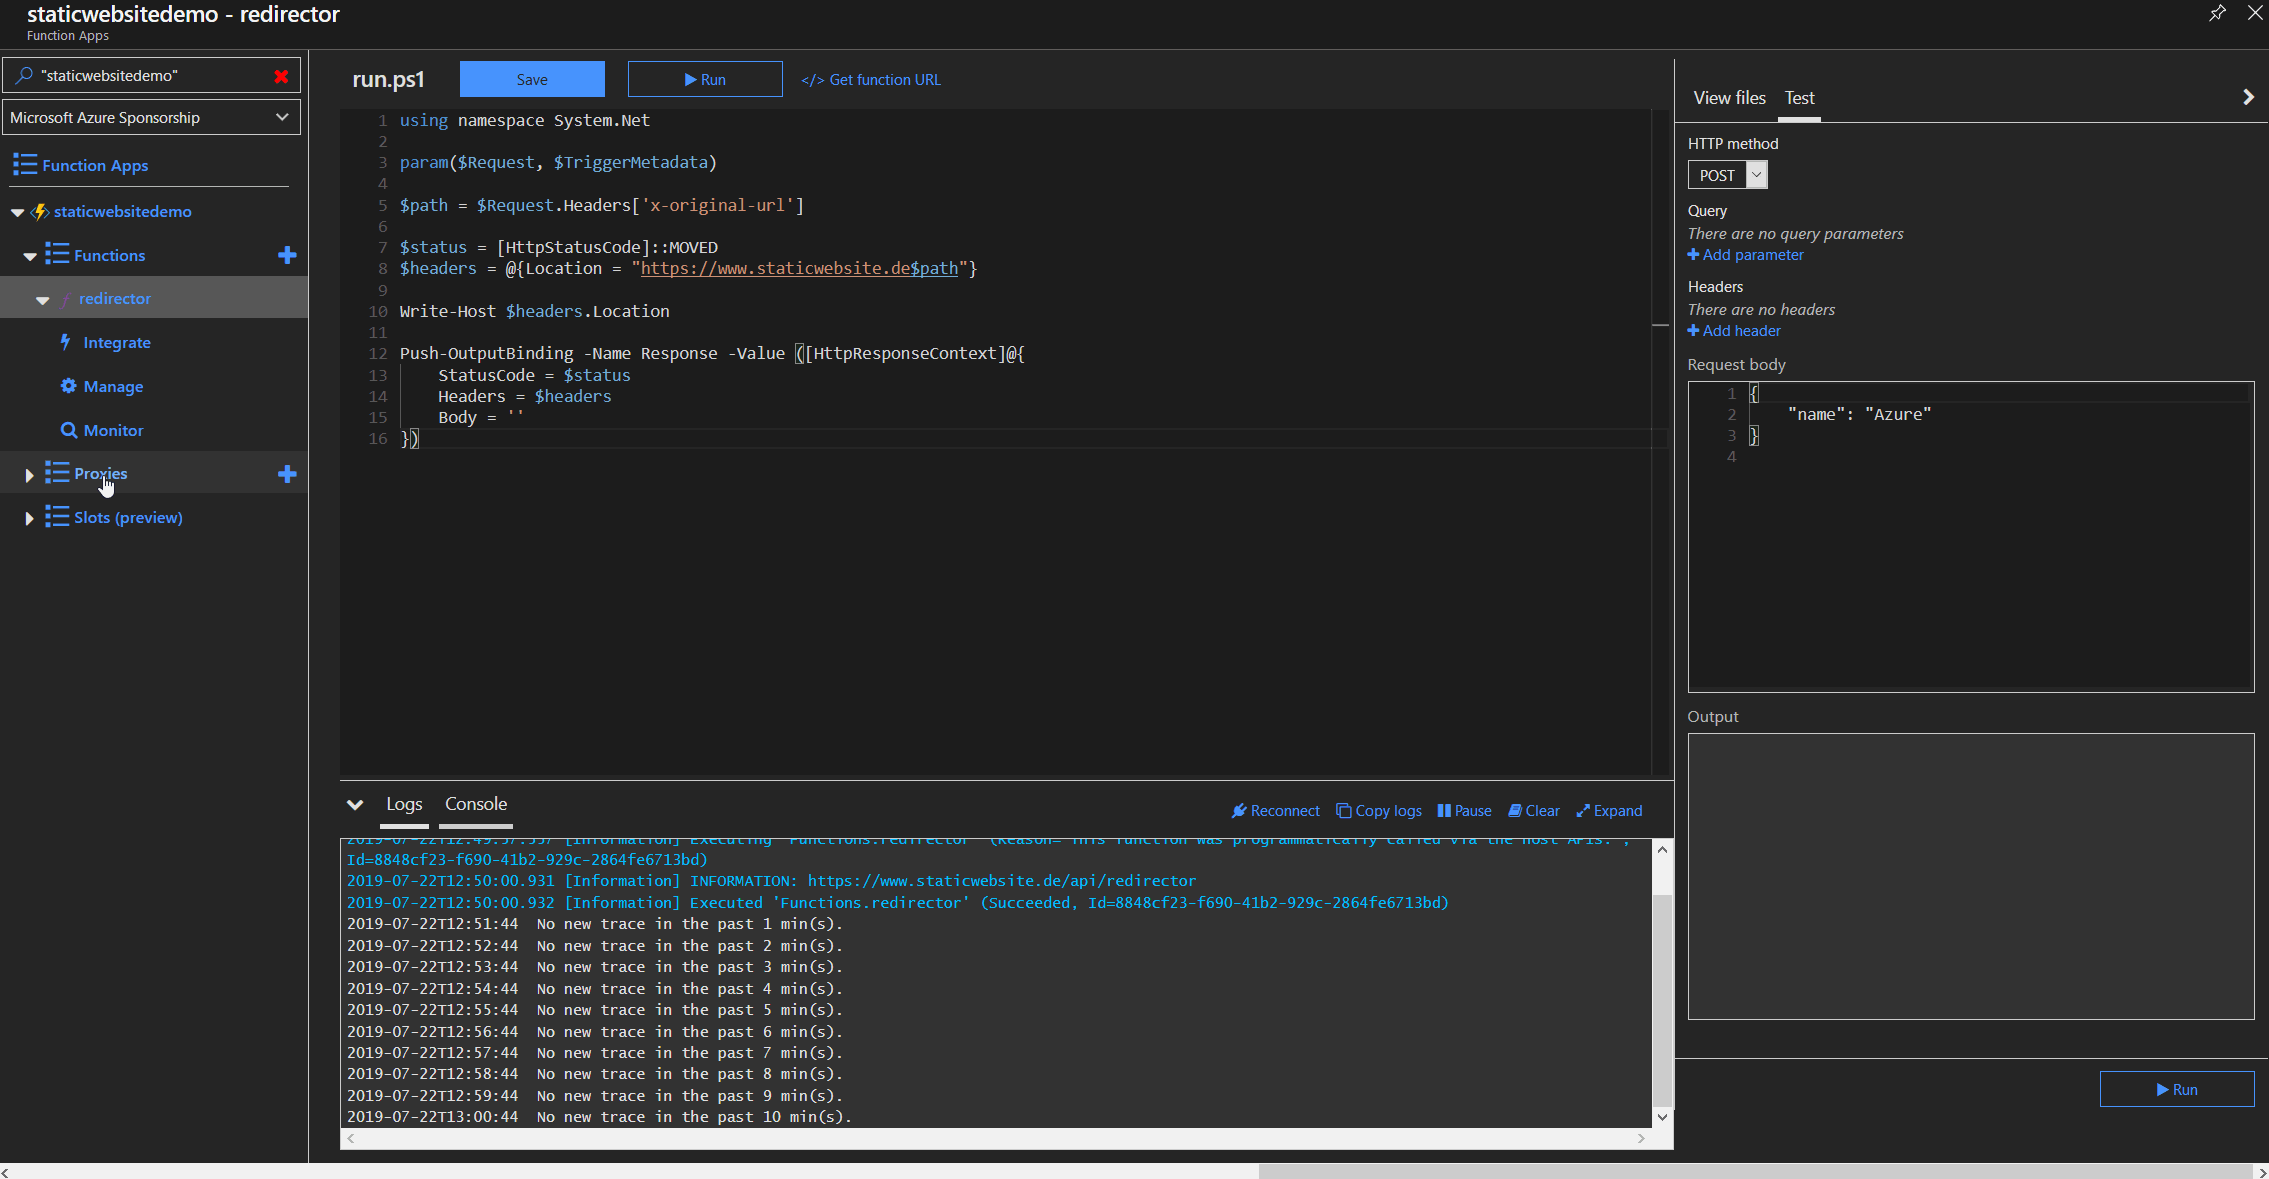
When the Function App is ready, we create a new function called “redirector” where the redirection logic will be implemented. We need a HTTP trigger and a HTTP reply as an output so we just use the HTTP trigger template.
We need to create a HTTP reply packet with code 301 for “Moved Permanently” and add the location parameter to the response header. The location parameter tells the browser, where the website has moved to and will directly follow that path.
1 | using namespace System.Net |
Map custom domain
Regarding to the documentation, it is necessary to add a CNAME for our custom domain. As explained in part 3, this is not possible for root domain (it’s why we are doing this in the first place :wink:), but with a little trickery we can use another validation method to add our custom domain. If we add our custom domain, the function app IP is shown in the portal. We have to create a A record for @ pointing to this IP. After clicking validate, the portal will tell us that only CNAME is supported for custom domain validation, but will show us the necessary TXT record, if we choose TXT based validation from the dropdown.
| DNS entry | type | value |
|---|---|---|
| www.staticwebsite.de | CNAME | staticwebsitede.azureedge.net |
| @ | A | (FunctionAppIp) |
| @ | TXT | (FunctionAppUrl) |
The trick is to click validate again and then switch back to CNAME. Now the custom domain has successful been added to the function app.
 Add custom domain
Proxy configuration
 Function proxy setup
To redirect all traffic from the root domain including everything after the forward slash e.g. http://staticwebsite.de/article01, we need to create a function proxy that redirects all traffic to our function app. By using the placeholder path, we can later use that part in the code to parse the origin url and append it to the www subdomain. In our example it would redirect to https://www.staticwebsite.de/article01.
SSL with Let’s Encrypt
Our redirection function works as expected, but we have just taken care of the HTTP protocol.
We don’t want our users to navigate to https://staticwebsite.de and get a certificate error, so we need to add a SSL certificate to our custom domain.
We will use the excellent Let’s Encrypt extension by sjkp for this.
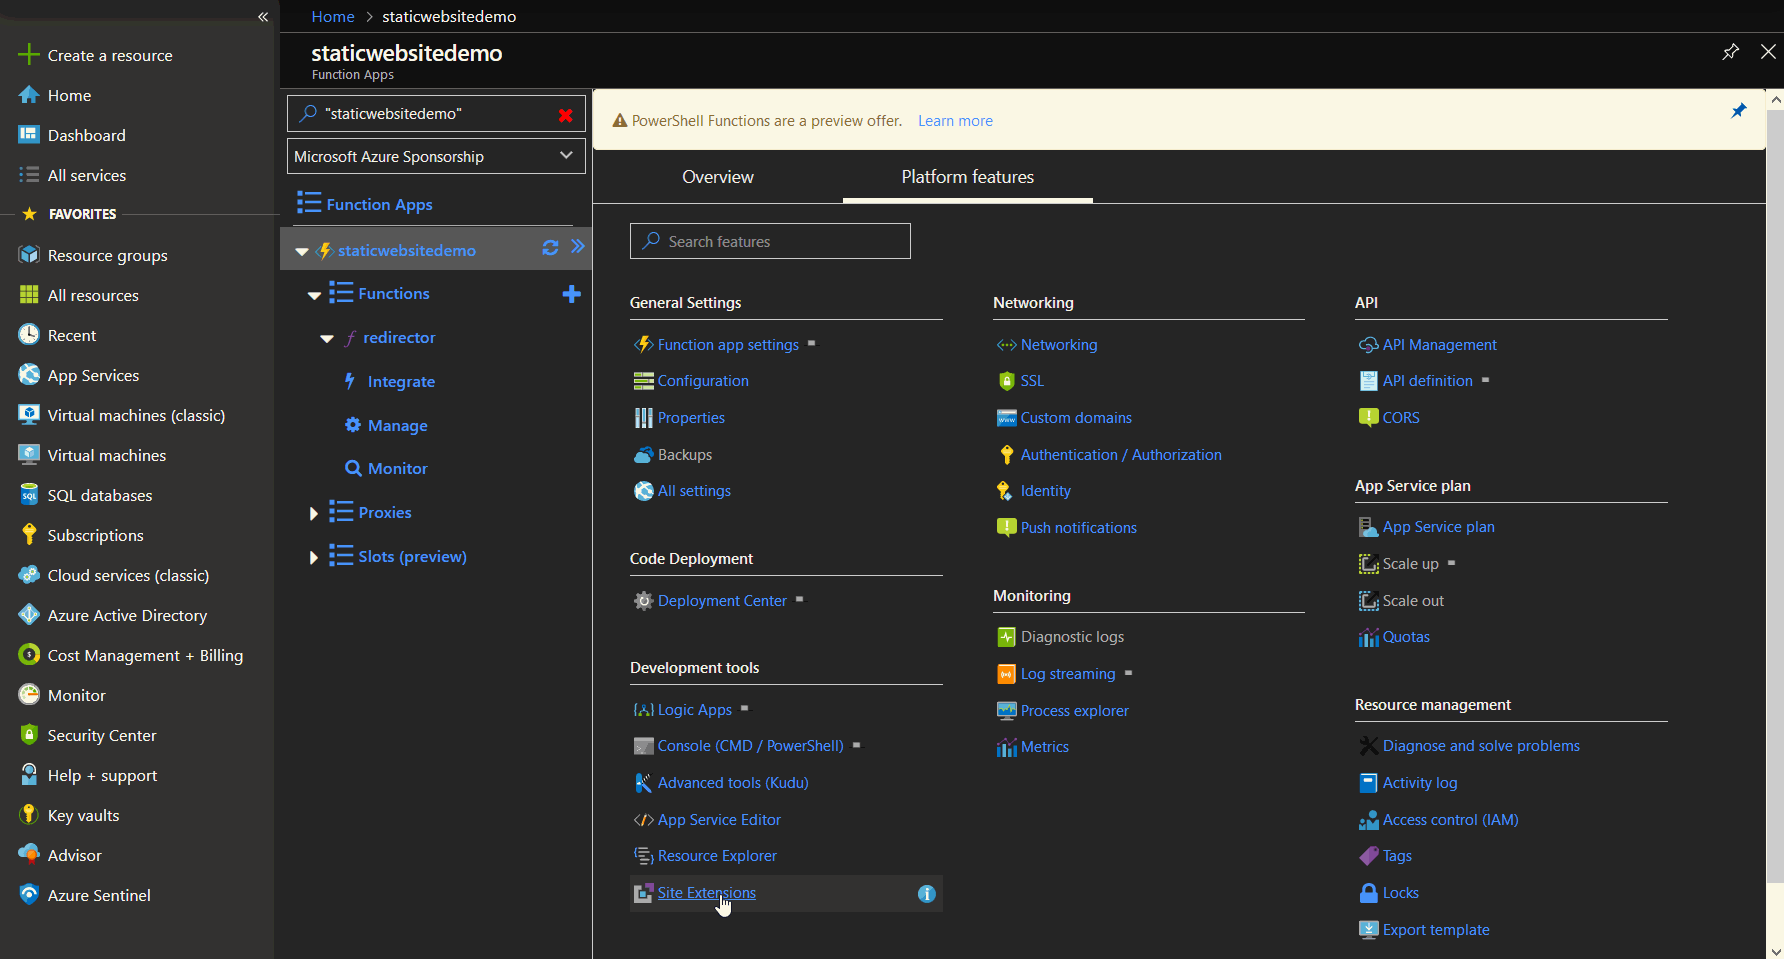
Install Let’s Encrypt extension
To install the Let’s Encrypt extension, we navigate to extension, click add and choose the Let’s Encrypt extension. Wait for the installation and restart the function app afterwards.
 Let's Encrypt extension installation
We verify the successful installation by browsing the Let’s Encrypt extension in the portal by navigating to “site extensions -> Azure Let’s Encrypt -> Browse”. The website should look like this:
 Let's Encrypt extension site
Normally this should work without problems, but if you run into timeouts or other errors, try restarting the Function App from Kudu using “Platform features -> Advanced tools (Kudu) -> Site extensions -> Restart Site”.
Let’s Encrypt reply function
We will create a new function in our app to reply to the ACME challenge and thereby validate the ownership of our domain.
 letsencrypt reply function
There is a functions v1 example for C# in the docs for the Let’s Encrypt extension that I used as a template for the following PowerShell function:
1 | using namespace System.Net |
Proxy configuration
Next we need to define a route for the so called “HTTP-01” ACME challenge. As it is a fixed defined path, we have to route traffic to the path http://{YOUR_DOMAIN}/.well-known/acme-challenge/{TOKEN} directly to our reply function. Read more about how letsencrypt validation works from the Challenge Types Documentation.
So let’s create a proxy called “letsencryptAcme” for the redirection with the token parameter captured in the rest variable. We use this variable in line 7 of our PowerShell function.
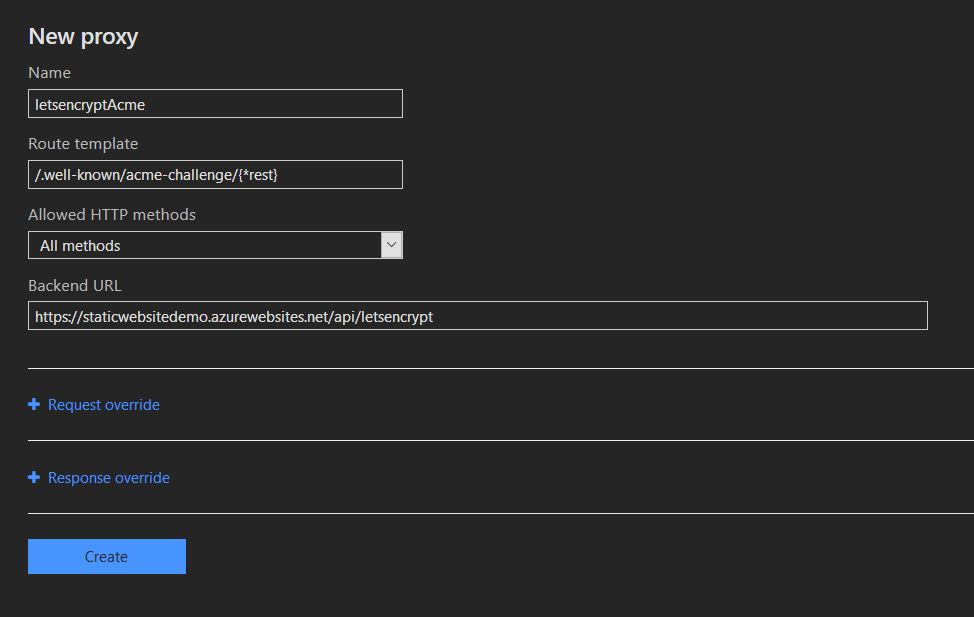 letsencrypt ACME proxy
Request and install certificate
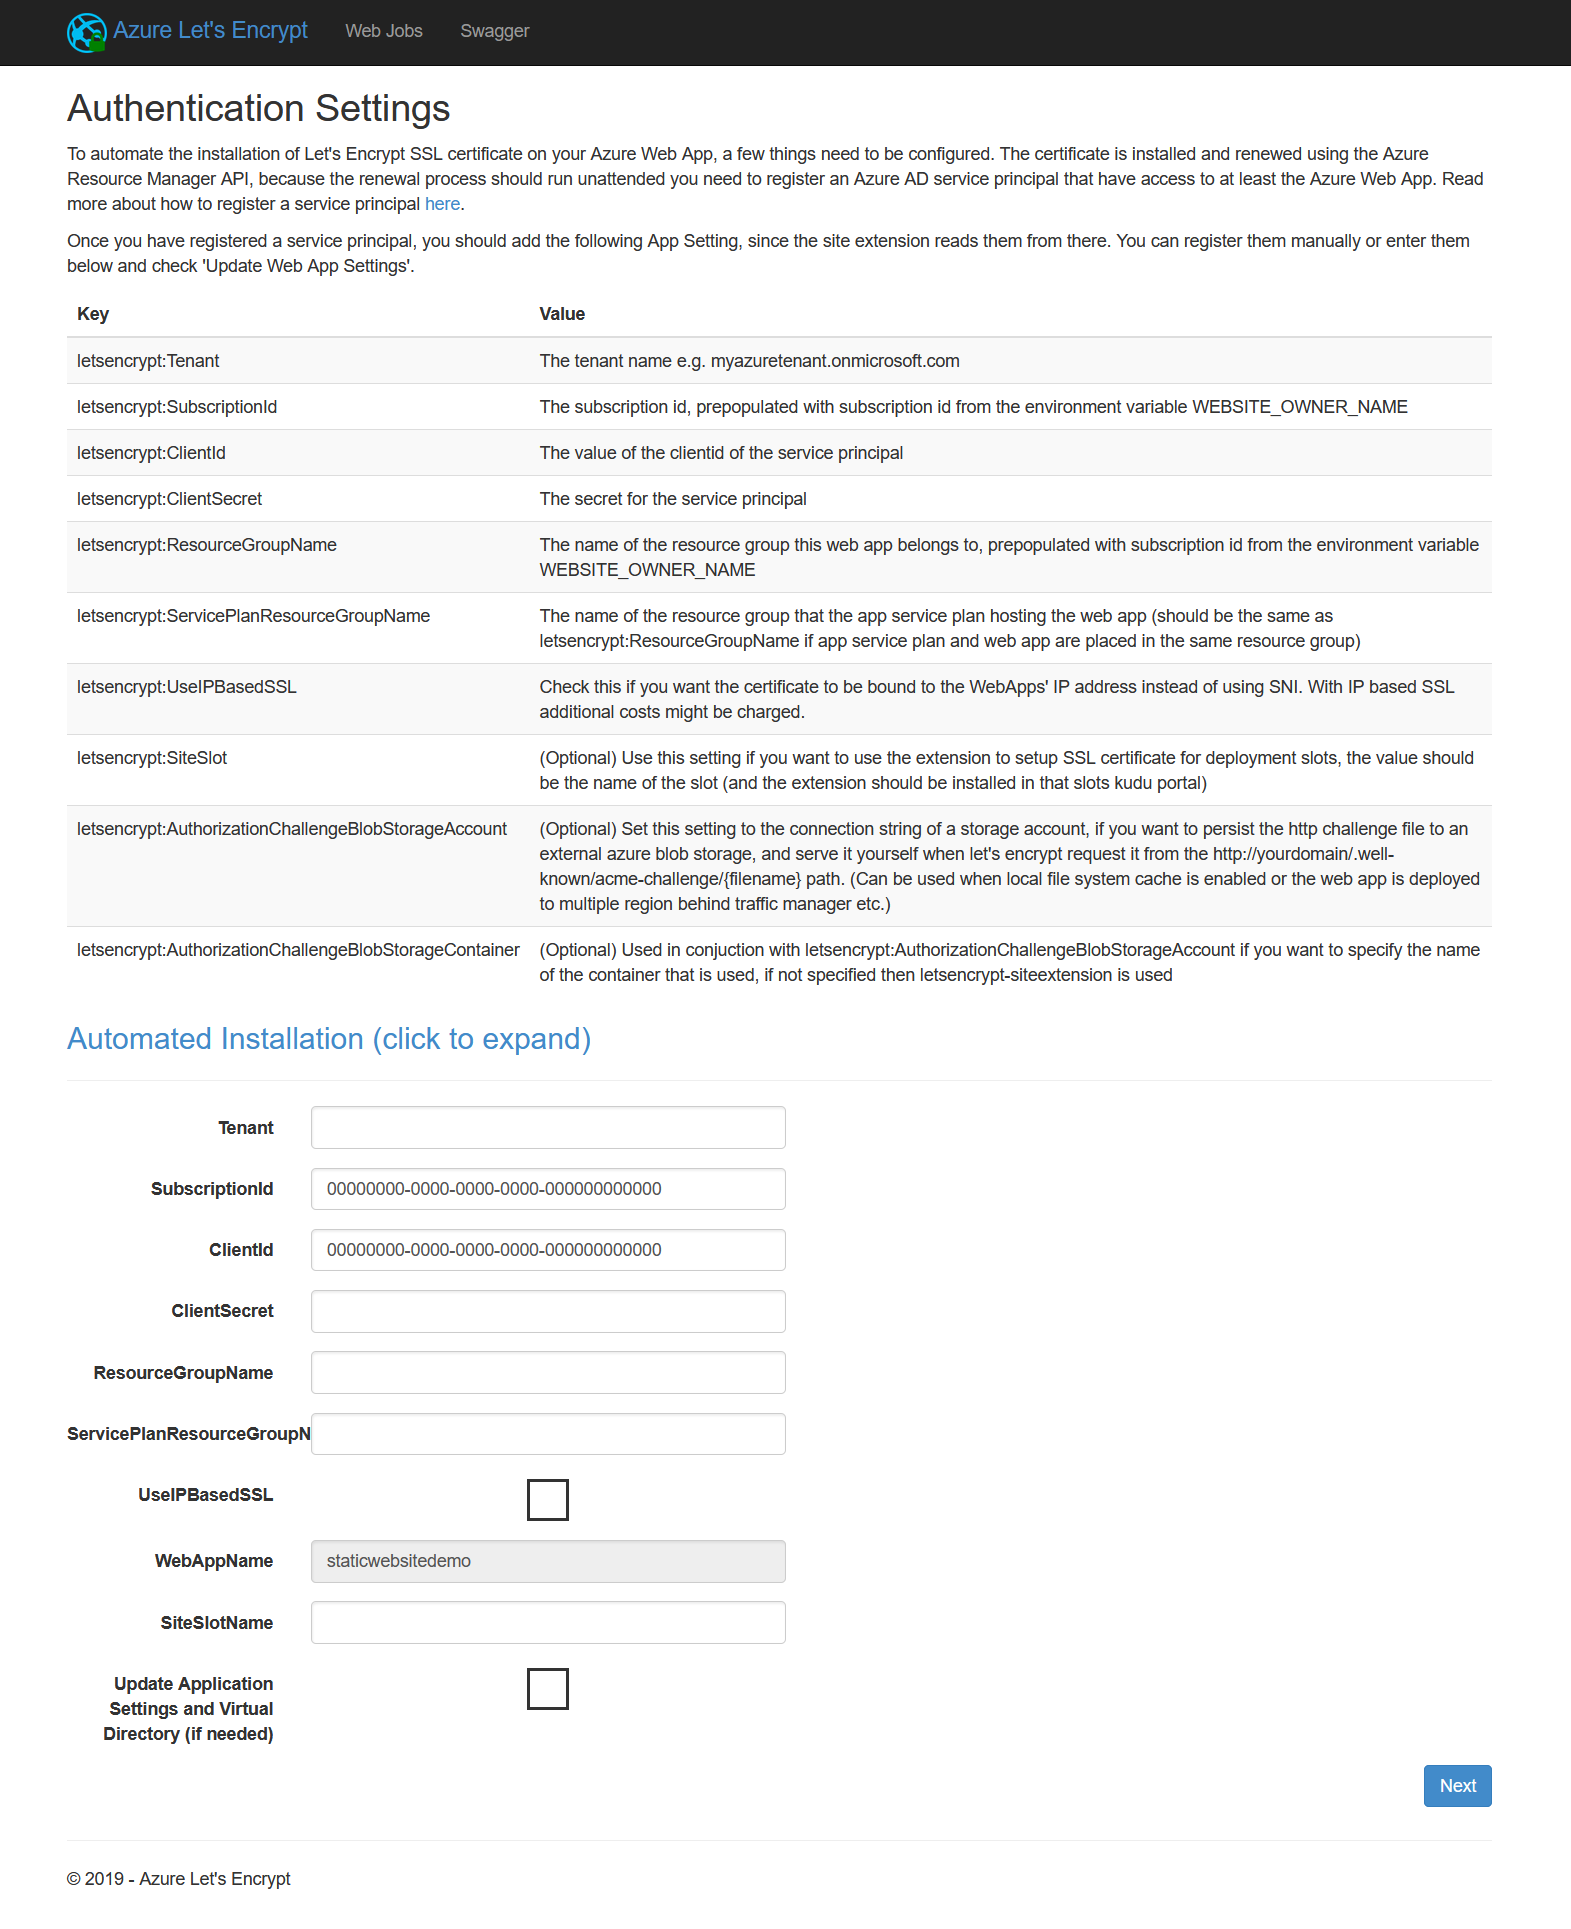
The last thing we need is an Azure Service Principal with permissions on the resourcegroup where the function app and the App Service plan are located. The process is explained by Microsoft in great detail HERE.
Now we have prepared everything for the Let’s Encrypt extension to be able to request and install a certificate for our custom domain. To open the web frontend of the Let’s Encrypt extension, we navigate to “Site Extensions -> Azure Let’s Encrypt -> Browse”.
We are now presented with a form where we have to insert all the details of our service principal as well as the function app name. If you don’t want to type your service principal credentials each time you request or renew a certificate, just check the “Update Application Settings and Virtual Directory (if needed)” checkbox.
The settings will then be saved to the application settings of the function app.
 Request and install the SSL certificate
The next step is to press next, choose a custom domain and hit the “Request and Install certificate” button.
After waiting about a minute, we are presented with our brand new or renewed SSL certificate in the summary.
If you want to deploy the extension as part of a deployment pipeline or as part of a “Run from package“ deployment, I recommend to set the application settings manually/by script. You can find a detailed guide on the parameters in the extensions GitHub repo.
Summary
We can test the redirection by opening the “Developer Tools” in Firefox, Chrome or Edge and visit https://staticwebsite.de.
The Response Headers look like this:
1 | HTTP/1.1 301 Moved Permanently |
The SSL certificate is acknowledged as valid and has the SHA1 thumbprint from the extensions summary page:
1 | { |
We now have a function app that listens on HTTP and HTTPS with a valid renewable free SSL certificate that redirects all our traffic to our www subdomain. Feel free to experiment and extend the redirection for your needs!